Access to the Site:
Poor access to the area where you intend to build your arena can lead to logistical challenges. For instance, suppliers might not be able to deliver materials directly to the site, potentially increasing haulage costs. Additionally, large machinery like diggers and lorries will be necessary during construction. Limited access means builders may have to use smaller vehicles, which can delay the project and increase costs. Therefore, it's highly recommended to select a location that provides ample space and accessibility for both people and large vehicles.
Alternatively, if access is limited and larger vehicles cannot reach the exact spot, you might consider collaborating with a local farmer. Farmers often have the equipment needed to move materials onto your site, and they might offer competitive rates compared to traditional haulage services. It’s worth exploring whether you can strike a mutually beneficial deal with a nearby farm.
Choosing the Right Drainage Location:
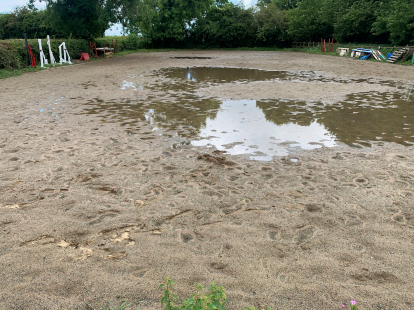
Proper drainage is crucial for the success of your arena. Before finalizing your location, determine where the drainage water will be discharged. Common options include soakaway systems or ditches. However, local regulations regarding discharge vary, so always consult with the relevant authorities.
Getting the Correct Levels:
It’s generally advised to minimize excavation as much as possible. Naturally, the more uneven the site, the more excavation will be required. If extensive excavation is unavoidable, be prepared for associated costs and the disposal of excess materials afterward. For sloped sites, the "cut and fill" method might be useful—this involves moving soil from higher areas to flatten lower ones. Unfortunately, leveling out a slope usually comes with significant costs.
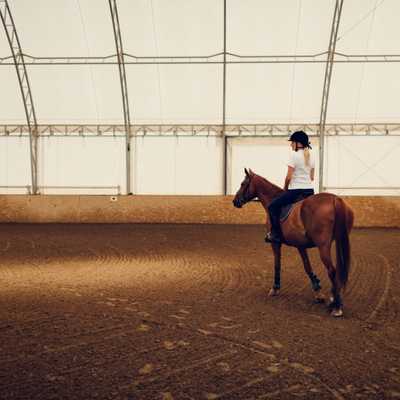
Protecting Against the Elements:
Horse arenas can be vulnerable to losing aggregates, such as silica sand used in the top layer, which can be blown away in windy conditions. To mitigate this, consider building your arena indoors or selecting an outdoor location near a hedgerow or surrounded by trees, which can act as natural windbreaks.
Marking Out and Excavation:
Once you’ve chosen the right area based on previous considerations, excavation can begin. Always mark out your arena slightly larger than intended to allow for proper construction. A one-meter buffer around the perimeter is recommended. For instance, if your arena is planned to be 100m x 80m, mark out a 102m x 82m area.
Place wooden posts at each corner, then use string lines and spray paint to outline the digging area. To verify accuracy, check that the diagonals are equal in length. After marking, start by removing the topsoil to expose the subsoil. Topsoil should be carefully piled or disposed of, as it can be reused or even sold in some cases. Keep the topsoil in good condition to facilitate landscaping after construction.
What Drainage Method Should I Use?
With the land excavated, it’s time to focus on the drainage system, which acts as the heart and lungs of your arena. If the drainage isn’t up to standard, the top layer will underperform, regardless of its quality. The "Herringbone Drainage System" is considered optimal. It involves a 100-150mm underground central pipe with 75-100mm perforated pipes angled at 45 degrees toward the central pipe every five meters. The central pipe should discharge into your chosen drainage method, such as a soakaway or ditch. Ensure the pipe depths align with the discharge point, and trenches should be moderately shallow.
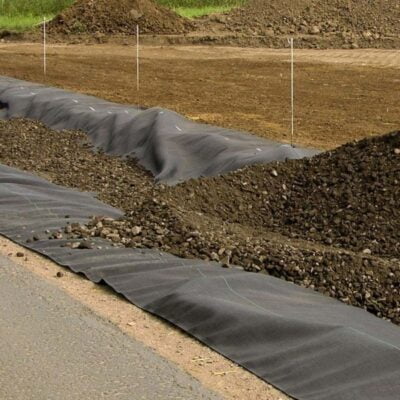
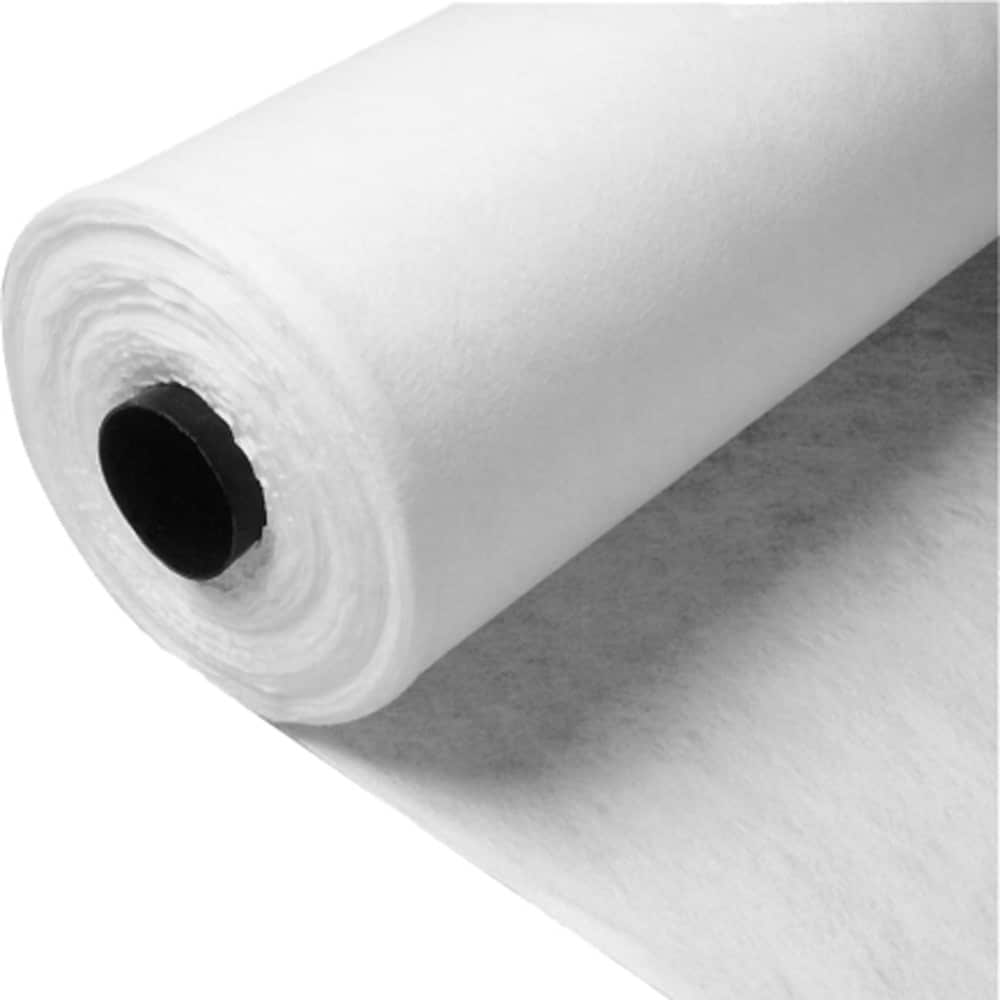
Using Woven Membrane for Equestrian Arenas
Next, install the bottom layer of woven geotextile membrane across the entire area. This membrane stabilizes the surface, preventing the mixing of aggregates with the soil below, thus avoiding issues like pitting and puddling. Ensure the membrane covers all areas where perforated pipework will be installed for maximum protection.
Perforated land drainage pipes can then be laid in their respective channels and backfilled with 20mm pea shingle to the original excavation level. Pea shingle should be clean to avoid blockages.
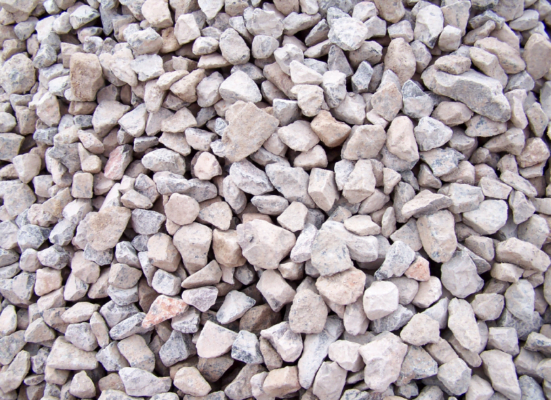
Sub Base and Fencing:
Once the site is leveled, it’s time to install the sub base, ideally six inches deep. Depending on your location, your choices for sub base material may vary. Crushed limestone is often recommended if available and cost-effective, as it provides a pure base superior to many impure recycled materials. Regardless, crushed rocks are generally preferred for sub bases if possible.
The sub base serves to trap water during heavy rain, reducing pressure on the drainage system. To maximize its effectiveness, the material should be between 75-40mm in size. Larger particles can hinder drainage, while smaller ones may pass through, increasing pressure on the drains. This process should involve a good laser level and an excavator equipped with a roller for compaction.
For fencing, a three-bar post and rail system is ideal. The bars should connect to the inside of the posts to prevent injury to riders and horses. Posts should be installed using a post knocker to reach the subsoil, and gravel boards should be attached to protect the posts from moisture and debris.
Using Non-Woven Membrane for Equestrian Arenas:
The upper membrane layer is critical. Use a non-woven geotextile membrane with a minimum weight of 300 GSM. Incorrect installation or a lower weight can lead to membrane damage and loss of silica sand. Secure the membrane to the gravel boards, ensuring joins are properly sealed. Failure to do so can result in sand passing through gaps, causing issues below and pushing the membrane upward, creating hazards for horses and riders.
Non-woven membranes allow water to pass through to the drainage system, unlike woven membranes, which can lead to water pooling. They also separate aggregates and stabilize the ground.
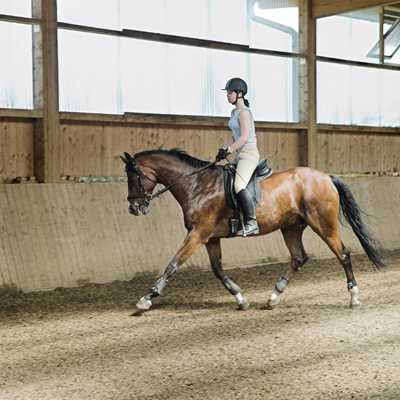
Surface Layer:
Most people opt for silica sand for the top layer, sometimes mixed with rubber chippings. The choice of aggregate depends on your budget after the main arena construction. Sand should be at least four inches deep, and no vehicles should pass over the geotextile membrane during placement to avoid damage. A pathway of sand is often created for vehicle access. A roller and laser level should be used to ensure the surface is flat.
Finally, add two inches of rubber chippings on top of the sand if desired. With that, your equestrian arena is complete, and you can enjoy countless hours of riding.
If you're unsure about anything, feel free to reach out via email or phone—we’re happy to assist!
Shop Horse Arena Membranes:
Explore our range of products designed specifically for horse arenas, including geotextile membranes, sub bases, and more. Whether you’re a professional builder or a hobbyist, we’ve got everything you need to create the perfect riding arena.
Bolt
Bolt,Bolts,Crew Bolt,Threaded Bolt
Jiangsu Jiajie Special Screw Co., Ltd , https://www.jiajiescrewcompany.com